Backup And Restore
Overview
The backup and restore process allows an administrator to export the contents of a running FMR instance and import them into a new installation.
This process is useful both for incident recovery and for migrating content from one installation to another. It preserves not only the current state of the registry, but also the full change history and related audit information.
Backups are created from an operational FMR instance using the fmrcl backup tool. The backup can then be restored during installation, either interactively through the UI or automatically using the Restore Web Service.
Note
Restore is only supported during the FMR installation process and requires an empty database schema. It is not possible to restore a backup onto an already operational FMR instance.
Procedure
- Use
fmrclto export the contents of the source FMR installation to disk. - Prepare an empty database schema for the target FMR instance.
- Start the target FMR instance and configure the database connection referencing the empty schema.
- Copy the exported files to a filesystem location accessible by the target FMR server. The files may also be zipped into a single archive.
- Restore the backup during the final Server Settings step of the installation process.
Step 1 - Export
Use the fmrcl command-line tool to back up the contents of an operational FMR instance to disk.
- Java 17 or later is required.
- The tool can be run on any machine that has access to the FMR's REST API.
- It's not possible to perform partial backups.
- The backup must be performed using an FMR account with administrator privileges.
export ADMIN_USER=root
export ADMIN_PASSWORD=******

fmrcl.sh -u ${ADMIN_USER} -p ${ADMIN_PASSWORD} -o ./backup -url https://registry.example.org
The contents of the registry specified by -url are retrieved and stored in the directory specified by -o. The directory is created automatically if it does not already exist.
On successful completion, the backup directory should contain folders and files similar to that shown in the following example. The structures directory contains one numbered subdirectory for each metadata change transaction. On actively maintained FMR installations, this may amount to tens of thousands of directories.
backup
├── metadata
│   └── allMetadata.xml
├── registration
│   └── allRegistrations.xml
└── structures
    ├── 1
    │   ├── audit.json
    │   └── structures.zip
    ├── 2
    │   ├── audit.json
    │   └── structures.zip
    ...
    ├── xxxx
    │   ├── audit.json
    │   └── structures.zip
    ├── structures.zip
    └── transactions.json
Step 2 - Prepare an empty database schema
Prepare an empty database schema using normal administration practices for your RDBMS.
Follow the guidance on creating a database schema if using a local or containerised MySQL or MariaDB database.
Step 3 - Start the FMR and configure the database connection
Start the FMR installation and configure the database connection following the normal software installation procedure.
Step 4 - Copy the backup to a location accessible by the FMR server
Copy the backup directory to a filesystem location accessible by the target FMR service. A mounted volume can be used for this purpose in containerised deployments.
The metadata, registration and structures directories should be organised under a parent directory as illustrated below.
The restore process takes the path of the parent directory as a parameter.
Ensure that the owner of the FMR Java process has read permissions.
Zip the backup directory contents, ensuring that the metadata, registration, and structures directories are at the root of the zip file.
Copy the zip file to a filesystem location accessible by the target FMR server. In a containerised deployment, this typically means copying the zip file into the container's filesystem or onto a mounted volume.
Ensure that the owner of the FMR Java process has read permissions.
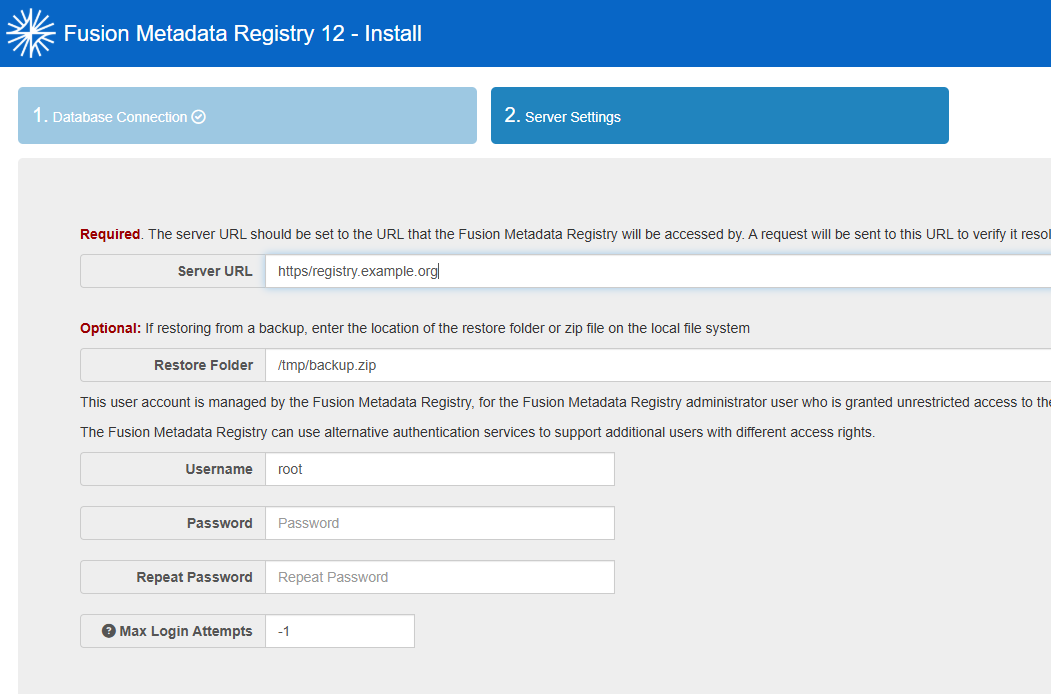
Step 5 - Restore the backup
In the final step of the FMR installation process, enter the path of the backup parent directory or the path of the zip file in Restore Folder.
Progress will be reported at the bottom of the page:

On success, the user interface should return to the normal homepage and the restored content should be available.
Before the FMR installation process has completed:
Start the restore job
POST the path of the backup zip file or backup parent directory as the request payload to /ws/secure/settings/restoreFromBackup. An HTTP 200 response indicates that the restore job has been accepted and started asynchronously.
If the backup is a zip archive:
curl 'https://registry.example.org/ws/secure/settings/restoreFromBackup' \
-X POST \
-d "/tmp/backup.zip"
Where the backup files are in a directory:
curl 'https://registry.example.org/ws/secure/settings/restoreFromBackup' \
-X POST \
-d "/tmp/backup"
Monitor progress
GET /ws/secure/settings/restoreStatus to monitor progress. This returns a JSON response in which Start and End are Unix epoch times. End is only present after the restore has finished.