Install Fusion Metadata Registry
Overview
Installing FMR involves two stages:
- Deploy the FMR web application archive (WAR) to Tomcat.
- Complete the initial configuration wizard in the browser.
Before you begin, make sure a supported database is available and that you know its connection details. See Databases.
Deploy the FMR software distribution
FMR is distributed as a single web application archive (WAR) file, available from sdmx.io.
To deploy FMR, copy the WAR file to Tomcat's webapps directory.
Note
The name of the WAR file in the webapps directory determines the path on which FMR is deployed.
Naming the file fmr.war deploys FMR on the /fmr path, for example http://localhost:8080/fmr.
Naming the file ROOT.war deploys FMR on the root path, for example http://localhost:8080.
On successful deployment, Tomcat will unpack the WAR into a directory of the same name.
The following example shows a successful deployment to the root path:
$ pwd
/usr/local/tomcat/webapps

$ ls -l
drwxr-x--- 7 root root      4096 Mar 31 15:31 ROOT
-rw-r--r-- 1 root root 125841965 Mar 27 16:57 ROOT.war

$ ls -l ROOT
total 20
drwxr-x--- 8 root root 4096 Mar 31 15:31 assets
drwxr-x--- 2 root root 4096 Mar 31 15:31 META-INF
-rw-r----- 1 root root    0 Mar 27 14:45 overview.html
drwxr-x--- 6 root root 4096 Mar 31 15:31 schemas
drwxr-x--- 5 root root 4096 Mar 31 15:31 wadl
drwxr-x--- 7 root root 4096 Mar 31 15:31 WEB-INF
Initial configuration
A two-step wizard guides the initial configuration.
Open the URL that matches the deployment path you chose for the WAR file:
http://localhost:8080if the WAR file is namedROOT.warhttp://localhost:8080/fmrif the WAR file is namedfmr.war
Step 1: Database Connection

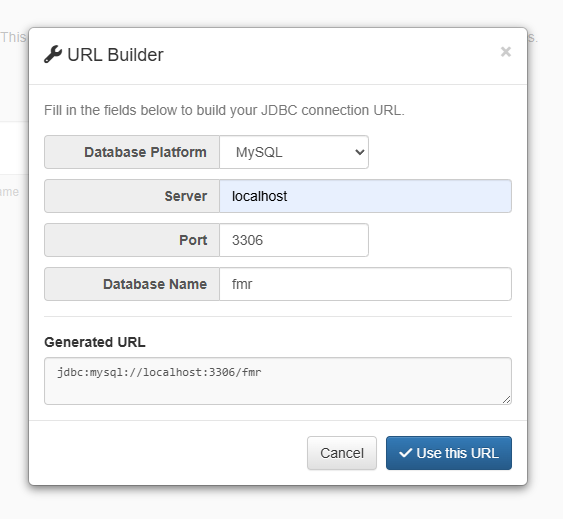
Choose JDBC as the connection type.
Enter the database connection details for the FMR database.
The main value is the Connection URL, also known as the connection string. If you already know the full connection string, enter it directly. Otherwise, use the URL Builder to assemble it.
When the database connection details are complete, continue to the next step.
Step 2: Server Settings
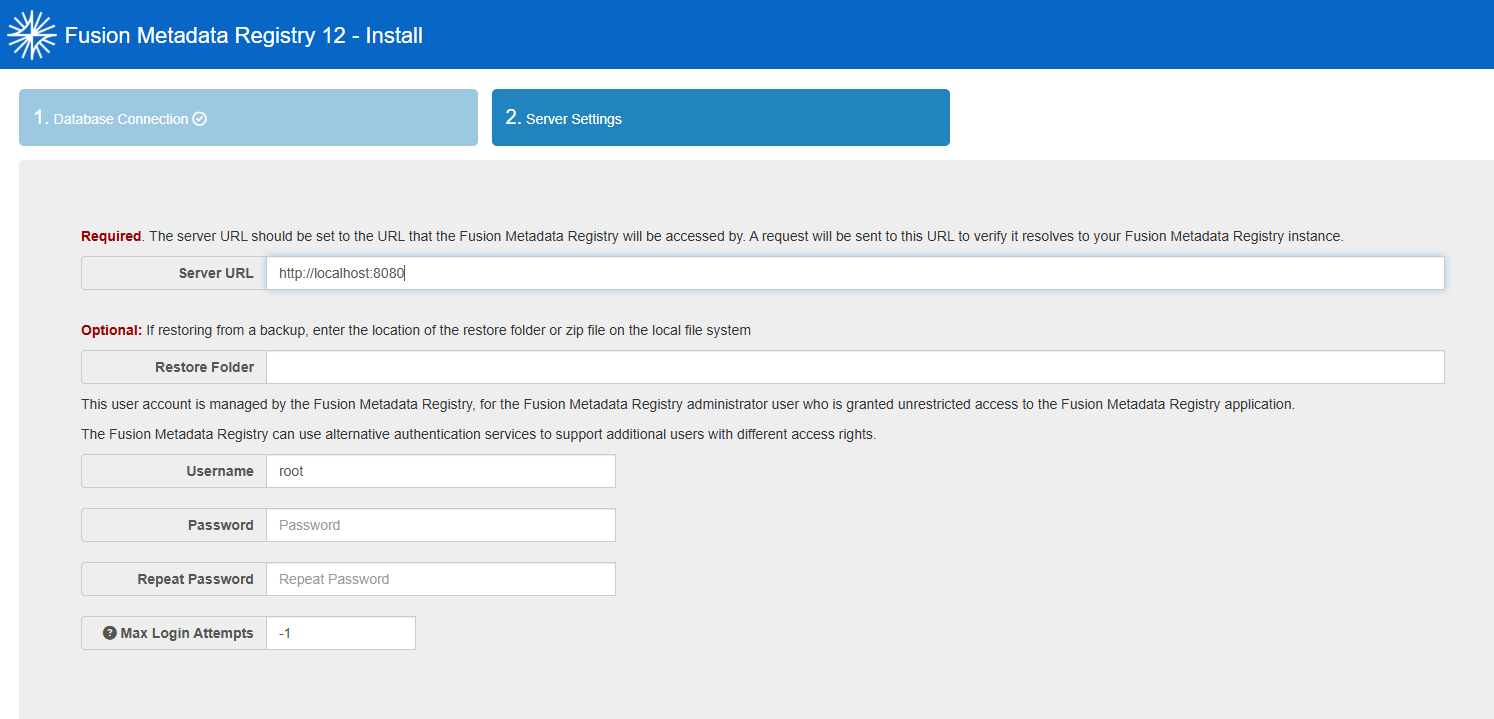
Server URL
The Server URL is the public base URL for the installation. It is used by the web user interface and by applications calling the REST API.
If this URL is incorrect, the browser will be unable to load assets such as images, stylesheets, and scripts causing the web user interface to appear broken.
Example Server URLs:
Note
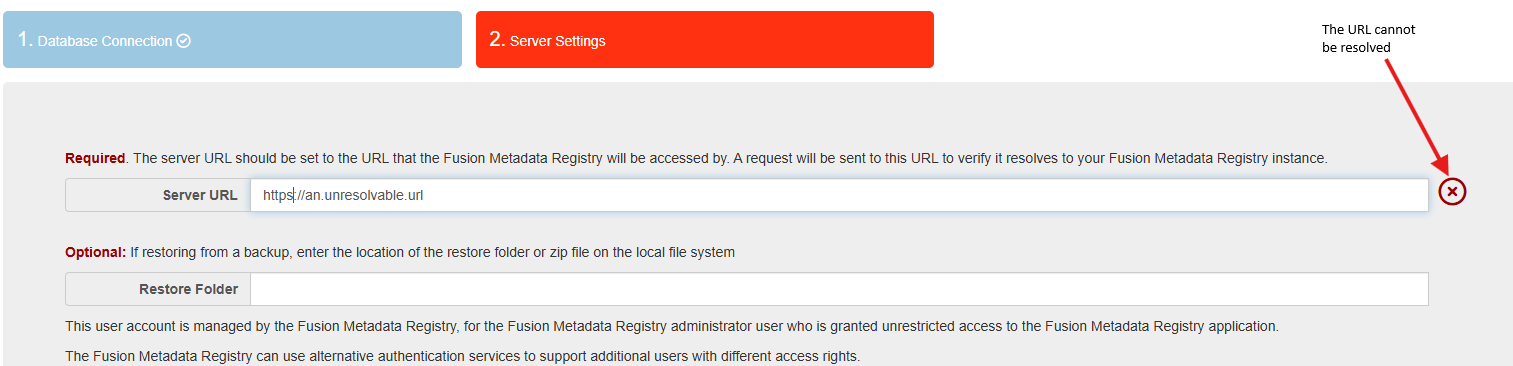
The FMR installation process validates the Server URL by calling it and checking for the expected response.
 Product installation cannot be completed until the Server URL check passes.
A common reason for this check to fail is that the installation environment cannot resolve the hostname.
In a containerised deployment, for example, if the service is published as https://registry.mydomain.org, the container must be able to resolve the registry.mydomain.org hostname.
Root superuser account
FMR provides a single internal superuser account intended for initial setup, recovery, and non-production use cases where more sophisticated access control is not required.
Set the username and password for this account during installation. They can be changed later from the Security / Root User Account admin menu.
The username is traditionally root, but you can choose an alternative such as admin.
It is recommended to set Max Login Attempts to a positive number so that the account is locked after repeated failed login attempts. If the account becomes locked, see Recover A Locked Root User Account.
Restore folder
You can optionally populate the installation from a backup during setup. A backup contains a full export of content, settings, and change history.
There are two key use cases:
- Migrating content from another FMR 11 or FMR 12 installation
- Restoring content from backup for recovery purposes
For more information, see Backup and restore.