Configure OIDC SSO
Use this page to configure OpenID Connect (OIDC) single sign-on (SSO) for Fusion Metadata Registry (FMR).
At a high level, the setup has two parts:
- Register the FMR installation as a client application in your identity provider (IdP).
- Enter the matching OIDC settings in FMR and verify the connection.
FMR uses the user's group membership for role-based authorisation, so your IdP must be able to return a groups claim as part of the sign-in process.
Step 1. Register FMR in the identity provider
Before configuring FMR, create an application registration in your IdP for the FMR installation.
Choose the client type
In most cases, FMR should be registered as a confidential client because it runs on a server and can securely store a client secret.
Use a public client only if your security policy requires it.
| Client type | How FMR authenticates to the IdP | FMR fields to complete | Additional IdP configuration |
|---|---|---|---|
| Confidential | Client ID and Client Secret | Client ID, Client Secret |
None |
| Public | PKCE1 | Client ID only |
Enable PKCE with challenge method S256 |
Configure the redirect URI
The redirect URI is the FMR callback URL that the IdP sends the user back to after successful authentication.
Note
The FMR OIDC callback path is /ws/fusion/oauth/callback.
Examples:
Add the correct redirect URI for your FMR environment to the client registration in the IdP.
Configure scopes and claims
FMR needs enough information from the IdP to identify the user and determine their group membership.
The minimum scopes are:
openidprofilegroups
Some IdPs do not expose groups by default, so you may need to configure that claim explicitly.
Step 2. Configure OIDC in FMR
From the Authentication Service page, choose the OIDC / AD / LDAP mode, then enter the OIDC settings for your IdP.
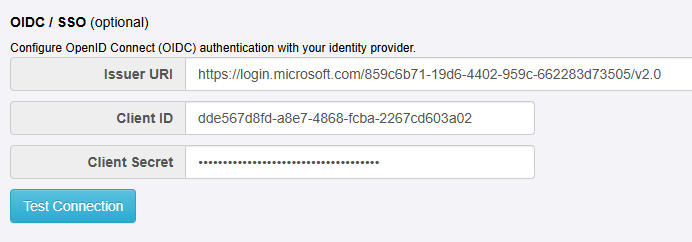
Issuer URI
Enter the IdP's issuer URI. This is the base OIDC issuer URL used by FMR to discover the provider's endpoints and signing keys.
Examples:
| IdP | URI pattern | Example |
|---|---|---|
| Microsoft Entra ID | https://login.microsoftonline.com/{tenant-id}/v2.0 |
https://login.microsoftonline.com/859c6b71-19d6-4402-959c-662283d73505/v2.0 |
| Keycloak | https://{keycloak-host}/realms/{realm} |
https://keycloak.mydomain.org/realms/my-organisation |
Client ID
Enter the client ID that was assigned when you registered FMR in the IdP.
Client Secret
- If FMR is registered as a confidential client, enter the client secret from the IdP.
- If FMR is registered as a public client, leave this field blank. FMR will use PKCE instead of a client secret.
Test Connection
Use Test Connection to confirm that FMR can reach the IdP.
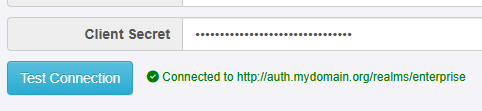
Note
Test Connection checks connectivity to the IdP. It does not confirm that the tenant, realm, client ID, client secret, scopes, or claims are all configured correctly.
Step 3. Complete authorisation setup
Successful sign-in only proves that authentication is working. To give users access inside FMR, you must also map the returned group names to FMR permissions.
Review these related pages:
Provider-specific examples
For provider-specific guidance, see:
-
Proof Key for Code Exchange (PKCE) protects public clients by replacing a fixed client secret with a per-request code challenge and verifier. ↩